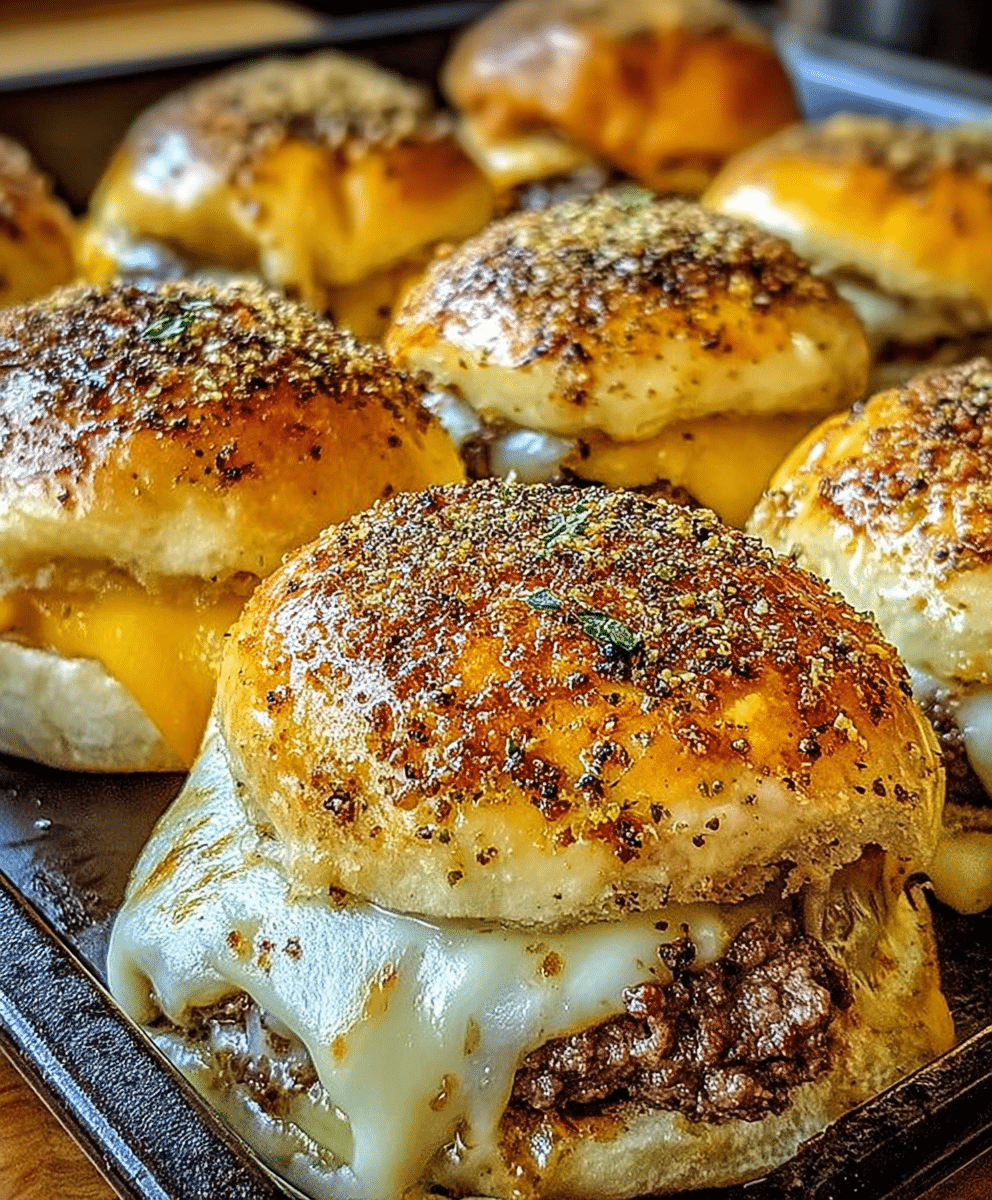
When it comes to comfort food with a fun, bite-sized twist, nothing beats Garlic Parmesan Cheeseburger Bombs. Imagine juicy ground beef, savory garlic, and two types of melted cheese all wrapped in fluffy, buttery biscuit dough. These little parcels of flavor are perfect for parties, game day, weeknight dinners, or whenever you crave a cheesy, savory snack that’s pure indulgence in every bite.
The best part? These cheeseburger bombs are deceptively easy to make. With just a handful of ingredients, you can transform everyday pantry staples into something truly irresistible. The combination of garlic, parmesan, cheddar, and fresh parsley brings a depth of flavor that turns simple cheeseburger filling into a gourmet experience.
Perfect for serving with a side of ketchup, mustard, or a creamy dipping sauce, these cheeseburger bombs are versatile enough for casual snacking or a centerpiece for an appetizer platter. Plus, they’re fun to assemble and even more fun to eat—guaranteed to disappear as soon as they hit the table!
Why You’ll Love This Recipe
- Quick & Easy: Minimal prep with just a few ingredients and a simple assembly process.
- Cheesy Goodness: A combination of parmesan and cheddar gives every bite rich, melty flavor.
- Crowd-Pleasing: Perfect for parties, game nights, or family dinners.
- Customizable: Swap cheeses, add seasonings, or include pickles for your favorite burger twist.
- Fun & Portable: Bite-sized pockets of flavor make for easy serving and snacking.
Ingredients Breakdown
Servings: 4–6
For the Filling:
- 1 pound ground beef
- 2 cloves garlic, minced
- ½ cup Parmesan cheese, diced
- 1 cup cheddar cheese, cubed
For the Dough & Finishing Touch:
- 1 can (16.3 oz) biscuit dough
- 2 tablespoons butter, melted
- 1 tablespoon parsley, chopped
Tools & Equipment Needed
- Baking sheet
- Parchment paper or silicone baking mat
- Skillet or sauté pan
- Wooden spoon or spatula
- Knife and cutting board
- Small bowl for melted butter
- Measuring cups and spoons
Step-by-Step Instructions
1. Preheat Oven
Set your oven to 375°F (190°C). Line a baking sheet with parchment paper or a silicone baking mat for easy cleanup and even baking.
2. Cook the Ground Beef
In a skillet over medium heat, sauté the minced garlic in a tablespoon of butter or oil for 30 seconds to release its aroma. Add the ground beef, season lightly with salt and black pepper, and cook until browned and fully cooked, breaking it up into small crumbles. Drain any excess fat if needed. Allow the beef mixture to cool slightly.
3. Prepare the Biscuit Dough
Open the can of biscuit dough and separate the biscuits. Flatten each biscuit into a small circle using your hands or a rolling pin. Make sure it’s large enough to fully enclose the filling.
4. Assemble the Cheeseburger Bombs
Place a small spoonful of cooked beef in the center of each flattened biscuit. Add a few cubes of cheddar cheese and diced parmesan on top. Fold the edges of the dough around the filling, pinching them together to seal completely. Make sure there are no gaps to prevent cheese from leaking during baking.
5. Brush with Butter and Bake
Arrange the filled biscuits seam-side down on the prepared baking sheet. Brush the tops with melted butter for a golden, flavorful crust. Bake for 12–15 minutes or until the biscuit dough is golden brown and the cheese inside is melted.
6. Garnish and Serve
Once baked, sprinkle with chopped parsley for a fresh, herbaceous touch. Serve immediately with your favorite dipping sauces like ketchup, mustard, or a creamy garlic aioli.
Tips & Variations
- Spicy Option: Add a pinch of crushed red pepper or a dash of hot sauce to the beef mixture for a mild kick.
- Vegetable Twist: Mix in finely diced onions, bell peppers, or mushrooms with the beef for added flavor and texture.
- Cheese Swap: Try mozzarella, pepper jack, or Swiss cheese for different flavor profiles.
- Mini Appetizers: Use smaller biscuits to create bite-sized cheeseburger bombs, perfect for parties or kids’ lunches.
- Make Ahead: Assemble bombs ahead of time and refrigerate for up to 24 hours before baking.
Flavor Profile & Pairings
Taste & Texture:
Garlic Parmesan Cheeseburger Bombs combine savory, umami-rich beef with melty cheddar and parmesan cheese. The biscuit dough is soft, slightly buttery, and golden on the outside, providing a satisfying contrast to the rich filling. Fresh parsley adds a pop of color and herbal brightness.
Drink Pairings:
- Wine: A light red such as Pinot Noir or a fruity Zinfandel complements the beef and cheese.
- Non-Alcoholic: Serve with sparkling water with a lemon wedge or iced tea to balance the richness.
Side Suggestions:
- Classic French fries or sweet potato fries
- Fresh salad or coleslaw
- Pickles or tangy slaw on the side for extra crunch
Nutritional Overview (Estimated per Serving)
- Calories: 380 kcal
- Protein: 20g
- Carbohydrates: 25g
- Fat: 22g
- Fiber: 1g
Dietary Considerations: Contains gluten and dairy; can be adapted with gluten-free biscuits and dairy-free cheeses.
Make-Ahead & Meal Prep Tips
- Prep Filling: Cook beef and mix with garlic ahead of time; refrigerate until ready to assemble.
- Assemble in Advance: Seal and store cheeseburger bombs in an airtight container for up to 24 hours before baking.
- Reheating: Bake at 350°F (175°C) for 5–7 minutes or microwave briefly. Cheese may not be as melty if fully cooled.
Frequently Asked Questions (FAQs)
1. Can I freeze these cheeseburger bombs?
Yes! Assemble unbaked bombs and freeze on a baking sheet for 1–2 hours, then transfer to a freezer-safe bag. Bake from frozen, adding a few extra minutes to cooking time.
2. Can I use pre-shredded cheese?
Absolutely. Just sprinkle or cube pre-shredded cheese and fold into the dough as usual.
3. Can I make them smaller or larger?
Yes! Mini versions are perfect for appetizers, and larger versions make a hearty meal. Adjust baking time slightly depending on size.
4. Can I add vegetables to the filling?
Yes! Finely diced onions, bell peppers, mushrooms, or jalapeños are great options for added flavor and nutrition.
5. Are these kid-friendly?
Definitely. Mild flavors, gooey cheese, and soft biscuit dough make them a hit with children. Consider leaving out the red pepper flakes for younger kids.
Cooking Timeline (at a Glance)
| Component | Prep Time | Cook Time | Notes |
|---|---|---|---|
| Beef & Garlic | 5 min | 7 min | Cook until browned |
| Biscuit Prep | 5 min | – | Flatten dough and prepare filling |
| Assembly | 10 min | – | Fill and seal biscuits |
| Baking | – | 12–15 min | Golden brown, cheese melted |
| Garnish & Serve | 2 min | – | Sprinkle parsley and serve |
Serving Suggestions
- Serve family-style on a platter with dipping sauces.
- Plate individually with a side of fries or salad for a complete meal.
- Great for game day, lunchboxes, or casual dinner parties.
Recipe Variations
- Bacon Cheeseburger Bombs: Add crispy bacon bits to the beef filling for extra indulgence.
- Italian-Style Bombs: Use mozzarella and marinara sauce inside the biscuit dough for a pizza-inspired twist.
- Breakfast Version: Mix cooked sausage or bacon with scrambled eggs and cheese for a morning-friendly bomb.
Ingredient Spotlight: Parmesan Cheese
Parmesan cheese adds a nutty, savory depth to the filling that elevates these cheeseburger bombs beyond ordinary. For best results, use freshly grated or diced parmesan instead of pre-shredded varieties, which may not melt as smoothly. Store in the fridge tightly wrapped or in an airtight container to preserve flavor.
Pro Cooking Tips
- Sealing Dough: Pinch seams carefully to prevent cheese from leaking during baking.
- Even Cooking: Ensure all bombs are roughly the same size for uniform baking.
- Cheese Layering: Mix both cheddar and parmesan into the beef mixture for more evenly distributed flavor.
Storage & Freezing Guide
- Refrigeration: Store cooked cheeseburger bombs in an airtight container for up to 3 days.
- Freezing: Freeze unbaked or baked bombs; reheat in the oven for best texture. Avoid microwaving frozen bombs to maintain crispness.
Nutrition Estimate Table (Per Serving)
| Nutrient | Amount |
|---|---|
| Calories | 380 kcal |
| Protein | 20g |
| Carbohydrates | 25g |
| Fat | 22g |
| Fiber | 1g |
Dietary Notes: Contains gluten and dairy. Gluten-free biscuit dough and dairy-free cheese can make this recipe allergy-friendly.
Conclusion
Garlic Parmesan Cheeseburger Bombs are the ultimate combination of convenience, comfort, and crowd-pleasing flavor. Juicy beef, savory garlic, and a blend of parmesan and cheddar cheese are wrapped in fluffy biscuit dough for a bite-sized explosion of flavor. Perfect for weeknight dinners, party platters, or a fun snack, these cheeseburger bombs are quick to prepare yet feel indulgent and gourmet.
With simple ingredients, easy assembly, and irresistible flavor, these bites are sure to become a favorite in your household. Serve them warm, add a fresh sprinkle of parsley, and watch them disappear fast!
Print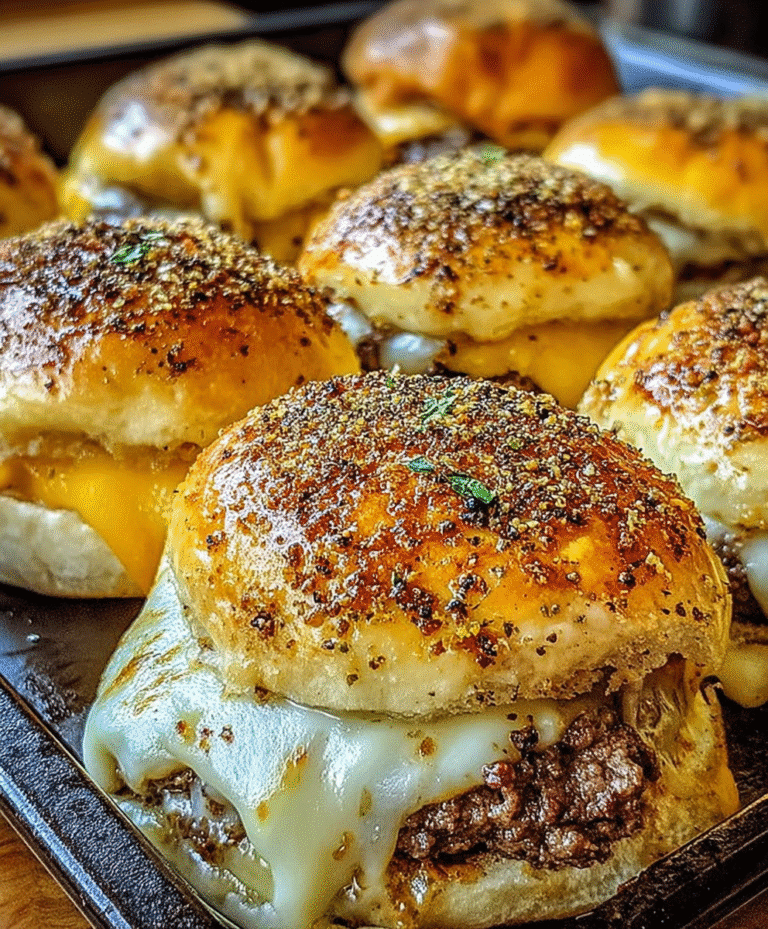
Garlic Parmesan Cheeseburger Bombs
Garlic Parmesan Cheeseburger Bombs are flaky biscuits stuffed with a savory cheesy garlic beef mixture, baked to golden perfection. Perfect as an appetizer, snack, or party treat.
- Total Time: 30 minutes
- Yield: 8 servings
Ingredients
- 1 pound ground beef
- 2 cloves garlic, minced
- 1/2 cup Parmesan cheese, diced
- 1 cup cheddar cheese, cubed
- 1 can (16.3 oz) biscuit dough
- 2 tablespoons butter, melted
- 1 tablespoon parsley, chopped
Instructions
- Preheat oven to 375°F (190°C).
- Brown beef with garlic in a skillet and drain fat.
- Stir Parmesan and cheddar cheese into the beef mixture.
- Flatten each biscuit, add filling, fold and seal edges completely.
- Place on a lined baking sheet, brush with melted butter.
- Bake 12-15 minutes until golden.
- Cool slightly, garnish with parsley, and serve warm.
Notes
Add extra garlic powder for more flavor. Ideal for parties and gatherings.
- Prep Time: 15 minutes
- Cook Time: 15 minutes
- Category: Tasty Bites
- Method: Baking
- Cuisine: American