Halloween is the season of sweet treats, spooky fun, and irresistible creativity in the kitchen. When October rolls around, the air fills with the scent of cinnamon, pumpkin, and of course, peanut butter. Enter: Peanut Butter Spider Halloween Cookies—a delightful mix of chewy peanut butter cookies, chocolatey centers, and adorable candy eyes that transform simple ingredients into edible works of Halloween art.
Whether you’re baking with kids, planning a Halloween party, or simply want a festive treat to enjoy with your pumpkin spice latte, these cookies deliver on every front. They’re fun to make, even more fun to decorate, and guaranteed to disappear fast from the cookie platter.
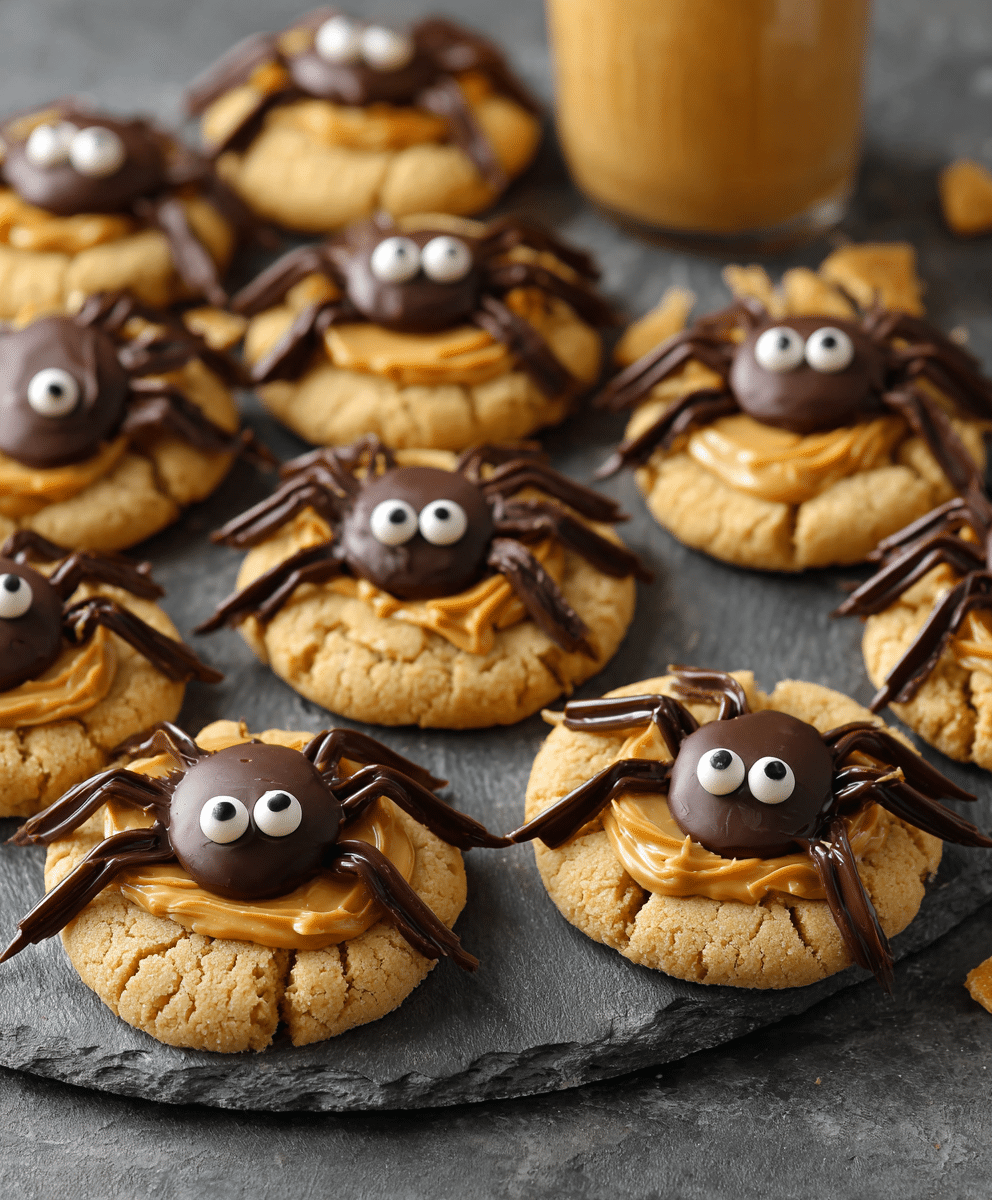
These cookies are soft, buttery, and packed with peanut butter flavor, topped with mini Reese’s Peanut Butter Cups that become the spider’s “body,” and finished with melted chocolate “legs” and candy eyes. They strike the perfect balance between spooky and sweet—proof that Halloween baking doesn’t have to be complicated to be spectacular.
Why You’ll Love This Recipe
- Halloween Ready: These spider-shaped cookies make any dessert table look festive and fun.
- Peanut Butter Perfection: Soft, chewy, and loaded with peanut butter flavor in every bite.
- Easy to Decorate: Even beginner bakers can create picture-perfect cookies with simple decorating steps.
- Kid-Friendly: A wonderful recipe to bake with children—fun, interactive, and messy in the best way.
- Crowd Favorite: A guaranteed hit at Halloween parties, bake sales, or cozy fall gatherings.
- Make-Ahead Friendly: The dough can be made ahead and chilled overnight for easy prep the next day.
Ingredients Breakdown
This recipe yields 15–20 cookies depending on the size of your dough balls. Every component works together for flavor, texture, and presentation.
Dry Ingredients
- 1¾ cups all-purpose flour – Provides structure and chewiness.
- 1 tsp baking soda – Helps the cookies rise and gives them that soft, tender center.
- ¼ tsp salt – Balances the sweetness and enhances peanut butter flavor.
Wet Ingredients
- ½ cup unsalted butter, room temperature – Adds richness and soft texture.
- ½ cup light brown sugar – Brings depth and moisture.
- ½ cup granulated sugar – Creates the perfect crisp edge.
- ½ cup smooth peanut butter – The hero ingredient that gives these cookies their signature flavor.
- 1 egg – Binds the dough and adds tenderness.
- 2 tsp vanilla extract – Rounds out the flavor beautifully.
- 1 tbsp whole milk – Softens the dough and ensures even baking.
For Decoration
- 15–20 miniature Reese’s Peanut Butter Cups – The spider bodies; perfectly bite-sized and delicious.
- ¼ cup semi-sweet chocolate – Melted for the spider legs and to “glue” on the eyes.
- 30–40 candy eyes – Two per cookie for a cute, spooky finish.
Tools & Equipment Needed
You don’t need fancy equipment—just some baking essentials to make the process smooth and fun.
- 2 cookie sheets
- Parchment paper
- Mixing bowls (one medium, one large)
- Whisk
- Hand mixer or stand mixer with paddle attachment
- Spatula
- Measuring cups and spoons
- Plastic wrap (for chilling dough)
- Wire cooling rack
- Microwave-safe bowl (for melting chocolate)
- Piping bag or small zip-top bag (for the spider legs)
Step-by-Step Instructions
Follow these detailed steps to ensure perfect cookies every time.
Step 1: Prepare the Baking Sheets
Line two cookie sheets with parchment paper and set them aside. This prevents sticking and makes cleanup easy.
Step 2: Combine Dry Ingredients
In a medium-sized bowl, whisk together:
- 1¾ cups all-purpose flour
- 1 tsp baking soda
- ¼ tsp salt
Set this dry mixture aside while you prepare the wet ingredients.
Step 3: Cream the Butter and Sugars
In a large mixing bowl (or stand mixer fitted with the paddle attachment), cream together:
- ½ cup unsalted butter, room temperature
- ½ cup light brown sugar
- ½ cup granulated sugar
Beat on medium speed until light, creamy, and fluffy—about 2–3 minutes. Scrape down the sides of the bowl to ensure even mixing.
Step 4: Add the Peanut Butter
Add ½ cup smooth peanut butter to the creamed butter and sugar. Continue mixing until fully incorporated and the mixture looks pale and whipped. This step infuses the dough with that classic peanut butter flavor and texture.
Step 5: Mix in Egg, Vanilla, and Milk
Add:
- 1 egg
- 2 tsp vanilla extract
- 1 tbsp whole milk
Mix until the dough is smooth and uniform, scraping down the sides to make sure everything blends evenly.
Step 6: Add the Dry Ingredients
Slowly add the flour mixture to the wet ingredients. Mix on low speed just until combined. The dough should be soft but not sticky. Avoid overmixing—this keeps the cookies tender.
Step 7: Chill the Dough
Cover the dough bowl tightly with plastic wrap and refrigerate for at least 2 hours or overnight. Chilling is key—it solidifies the fats, enhances the peanut butter flavor, and prevents the cookies from spreading too much while baking.
Step 8: Preheat and Shape
Preheat your oven to 375°F (190°C).
Scoop the dough into 2 tablespoon-sized balls and place them on the prepared cookie sheets, spaced about 2 inches apart to allow for spreading.
Step 9: Bake
Bake the cookies for 10–12 minutes, or until golden brown around the edges. The centers will still look slightly soft—that’s perfect. They’ll continue to set as they cool.
Step 10: Add the Reese’s Cups
Once out of the oven, let the cookies rest on the baking sheet for 3–5 minutes.
Now, gently press a miniature Reese’s Peanut Butter Cup onto the center of each cookie.
Timing matters:
- If you press them too early, the Reese’s will melt and lose their shape.
- If you wait too long, they won’t adhere properly.
Allow the cookies to cool completely on a wire rack before decorating.
Step 11: Melt the Chocolate
Once the cookies have cooled and the Reese’s are set, melt ¼ cup semi-sweet chocolate in a microwave-safe bowl. Heat in 30-second intervals, stirring between each, until smooth and glossy.
Step 12: Decorate
Transfer the melted chocolate to a piping bag (or a small zip-top bag with the corner snipped off). Pipe eight spider legs extending from each Reese’s Cup—four on each side.
Use a small dab of melted chocolate to attach two candy eyes to the front of each “spider.”
Allow the chocolate to set completely before moving or serving.
Step 13: Enjoy!
Once set, your cookies are ready to enjoy! These adorable peanut butter spiders are spooky, sweet, and perfectly chewy.
Tips & Variations
- Chill the Dough Properly: Don’t skip the chilling time. It helps the cookies bake evenly and hold their shape.
- Perfect Timing for Reese’s: Wait a few minutes after baking before pressing the candies on top—this prevents melting.
- Even Legs: Use a fine piping tip for cleaner lines when drawing the legs.
- Peanut-Free Alternative: Substitute the peanut butter and Reese’s with sunflower seed butter and mini chocolate cups for a nut-free version.
- Festive Twist: Add a drizzle of orange-colored chocolate or edible glitter for a Halloween party upgrade.
Flavor Profile & Pairings
These cookies combine the best of peanut butter and chocolate in one festive bite.
- Taste: Sweet and nutty with a hint of saltiness, balanced by rich chocolate.
- Texture: Soft and chewy center, crisp edges, and a creamy Reese’s top.
- Aroma: Warm, buttery peanut butter scent with hints of vanilla.
They pair perfectly with a tall glass of milk, hot cocoa, or a warm cup of coffee during those cozy fall evenings.
Nutritional Overview
While these cookies are a treat meant for indulgence, here’s an estimated nutritional breakdown per serving (based on 20 cookies):
- Calories: 210
- Carbohydrates: 25 g
- Protein: 4 g
- Fat: 11 g
- Saturated Fat: 5 g
- Cholesterol: 25 mg
- Sodium: 130 mg
- Sugar: 16 g
- Fiber: 1 g
Make-Ahead & Storage Tips
Make-Ahead:
- Dough: Prepare and chill the dough for up to 24 hours before baking.
- Baked Cookies: Bake and cool completely, then decorate the next day if preferred.
Storage:
- Room Temperature: Store cookies in an airtight container for up to 5 days.
- Refrigerator: Keep up to 7 days for maximum freshness.
- Freezing Dough: Shape the dough balls, freeze on a tray, then transfer to a freezer bag. Bake directly from frozen, adding 1–2 minutes to the bake time.
- Freezing Cookies: Freeze undecorated cookies for up to 2 months. Thaw at room temperature before decorating.
FAQs
1. Can I make the dough ahead of time?
Yes! You can chill the dough for up to 24 hours before baking.
2. My cookies spread too much—what went wrong?
The dough may have been too warm. Always chill thoroughly before baking.
3. Can I use crunchy peanut butter?
You can, but smooth peanut butter gives a better texture and cleaner look.
4. Can I use milk chocolate instead of semi-sweet?
Absolutely. Any chocolate that melts smoothly will work for piping legs.
5. What can I use instead of Reese’s cups?
Try mini chocolate truffles, Rolos, or homemade peanut butter cups.
6. How long do the decorations take to set?
The chocolate legs and eyes set in about 30 minutes at room temperature or 10 minutes in the fridge.
Cooking Timeline (At a Glance)
| Step | Task | Time |
|---|---|---|
| 1 | Mix & chill dough | 2 hrs |
| 2 | Shape & bake | 10–12 mins |
| 3 | Cool & add Reese’s | 10 mins |
| 4 | Decorate | 15 mins |
| Total Time | ~2 hrs 45 mins (including chilling) |
Serving Suggestions
Serve these cookies on a black or orange platter for a striking Halloween presentation. Surround them with candy corn, mini pumpkins, or other festive treats.
They also make a wonderful edible gift—stack them in clear treat bags tied with a Halloween ribbon.
For parties, consider pairing them with themed desserts like ghost cupcakes or monster brownies for a complete spooky dessert spread.
Recipe Variations
- Double Chocolate Spider Cookies: Replace ¼ cup flour with cocoa powder for a darker, richer base.
- Pumpkin Spider Cookies: Add 1 teaspoon pumpkin pie spice for a seasonal flavor twist.
- Nut-Free Spider Cookies: Use sunflower seed butter and dairy-free chocolate.
- Mini Spider Bites: Make smaller, bite-sized cookies topped with mini chocolate chips instead of Reese’s.
Ingredient Spotlight
Peanut Butter
The heart of this recipe. Choose smooth, no-stir peanut butter for consistent texture. Natural peanut butter can separate and affect baking consistency.
Storage Tip: Keep tightly sealed at room temperature. Stir before measuring for even consistency.
Reese’s Peanut Butter Cups
Miniature Reese’s make the perfect “spider bodies.” Their shape, flavor, and color fit the theme beautifully.
Alternative: For nut allergies, use nut-free chocolate cups or small truffles.
Candy Eyes
These tiny sugar decorations instantly bring personality to your cookies. Available in most baking aisles or craft stores.
Pro Baking Tips
- Cream Butter Properly: Beat butter and sugars until fluffy for the perfect cookie texture.
- Don’t Overmix: Mix flour in gently to avoid dense cookies.
- Chill Is Key: Chilled dough keeps cookies from spreading too thin.
- Watch the Oven: Bake just until golden brown; overbaking leads to dryness.
- Decorate on Cool Cookies: Ensure Reese’s and chocolate set properly before adding eyes.
Storage & Freezing Guide
| Type | Method | Duration |
|---|---|---|
| Room Temperature | Airtight container | 5 days |
| Refrigerated | Airtight container | 7 days |
| Dough (Unbaked) | Wrapped or bagged | 2 months |
| Baked (Undecorated) | Freezer-safe container | 2 months |
Defrosting: Thaw overnight in the fridge or for 1 hour at room temperature.
Nutrition Estimate (Per Cookie)
| Nutrient | Amount |
|---|---|
| Calories | 210 kcal |
| Carbohydrates | 25 g |
| Protein | 4 g |
| Fat | 11 g |
| Saturated Fat | 5 g |
| Cholesterol | 25 mg |
| Sodium | 130 mg |
| Sugar | 16 g |
| Fiber | 1 g |
Dietary Notes: Contains peanuts, dairy, and gluten. Can be made nut-free with substitutions.
Expanded Conclusion
When it comes to Halloween baking, it’s the little details that make the biggest impact—and these Peanut Butter Spider Halloween Cookies prove it. They’re festive without being complicated, fun without being fussy, and so delicious you’ll want to bake them all year long.
Each bite is the perfect blend of sweet, salty, and chocolatey goodness. The soft peanut butter cookie base paired with the creamy Reese’s center creates a comforting texture that melts in your mouth. The candy eyes and chocolate legs turn simple cookies into edible art, sparking smiles and laughter for kids and adults alike.
Whether you’re hosting a Halloween bash, baking for a school party, or simply treating yourself to something festive, these cookies are sure to steal the spotlight. So grab your apron, cue the spooky playlist, and get ready to bake a batch of adorably creepy peanut butter spiders that everyone will love.
Print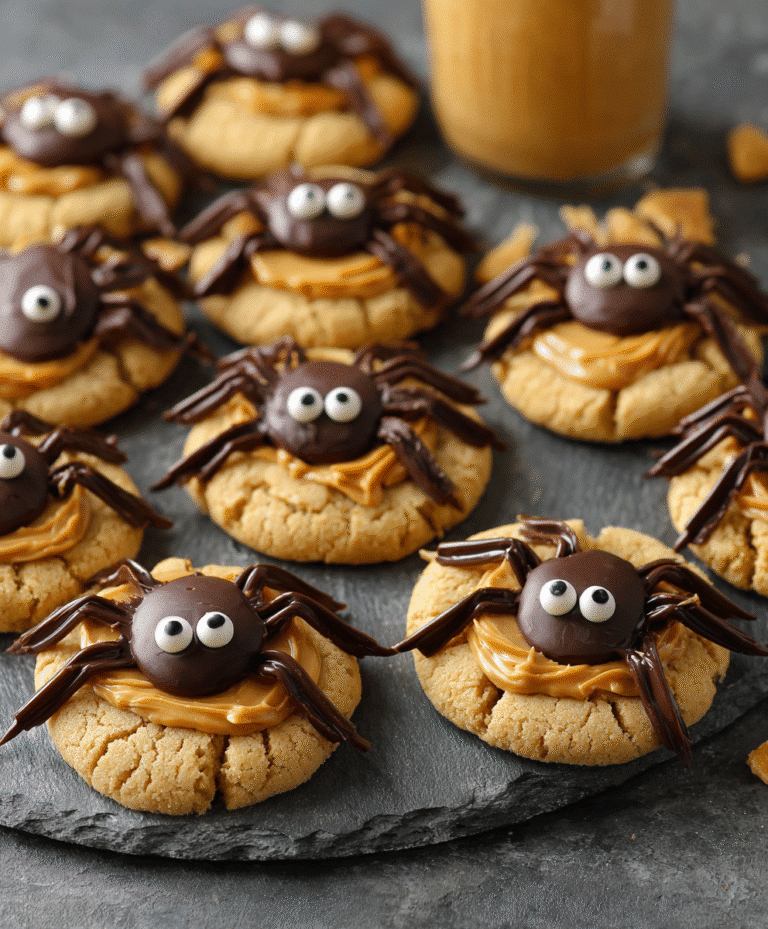
Peanut Butter Spider Halloween Cookies
Peanut Butter Spider Halloween Cookies are spooky-cute treats made with soft peanut butter cookies topped with mini Reese’s cups and chocolate spider legs. They’re fun to make, deliciously nutty, and the perfect Halloween baking project for kids and families!
- Total Time: 25 minutes + chill time
- Yield: 15–20 cookies
Ingredients
- 1 3/4 cups all-purpose flour
- 1 tsp baking soda
- 1/4 tsp salt
- 1/2 cup unsalted butter, room temperature
- 1/2 cup light brown sugar
- 1/2 cup granulated sugar
- 1/2 cup smooth peanut butter
- 1 egg
- 2 tsp vanilla extract
- 1 tbsp whole milk
- 15–20 miniature Reese’s peanut butter cups
- 1/4 cup semi-sweet chocolate (for legs and eyes)
- 30–40 candy eyes
Equipment
- 2 baking sheets
- Parchment paper
- Mixing bowls
- Hand mixer or stand mixer
- Spatula
- Piping bag (for chocolate legs)
- Wire cooling rack
Instructions
- Line two baking sheets with parchment paper and set aside.
- In a medium bowl, whisk together flour, baking soda, and salt. Set aside.
- In a large bowl or stand mixer, cream together butter, brown sugar, and granulated sugar until light and fluffy.
- Add peanut butter and mix until creamy and well combined.
- Beat in egg, vanilla extract, and milk until smooth.
- Add dry ingredients to the wet mixture and mix until just combined. Do not overmix.
- Cover the dough and refrigerate for at least 2 hours or overnight.
- Preheat oven to 375°F (190°C). Scoop dough into 2-tablespoon balls and place 2 inches apart on prepared sheets.
- Bake for 10–12 minutes, until lightly golden brown.
- Let cookies cool on the baking sheet for 3–5 minutes before gently pressing a mini Reese’s cup into the center of each cookie.
- Transfer to a wire rack to cool completely.
- Once cooled, melt the semi-sweet chocolate in 30-second intervals, stirring between each, until smooth.
- Transfer melted chocolate to a piping bag and pipe eight legs from each Reese’s cup outward—four on each side.
- Use the melted chocolate to “glue” two candy eyes to each spider cookie.
- Allow chocolate to set, then serve and enjoy!
Notes
- Chilling the dough helps prevent spreading and keeps cookies thick and soft.
- Let cookies cool slightly before adding Reese’s cups to avoid melting.
- Use candy melts instead of chocolate chips for smoother piping, if preferred.
- Store cookies in an airtight container at room temperature for up to 5 days or refrigerate for up to a week.
- Prep Time: 15 minutes
- Cook Time: 10 minutes
- Category: Desserts
- Method: Baking
- Cuisine: American
- Diet: Vegetarian