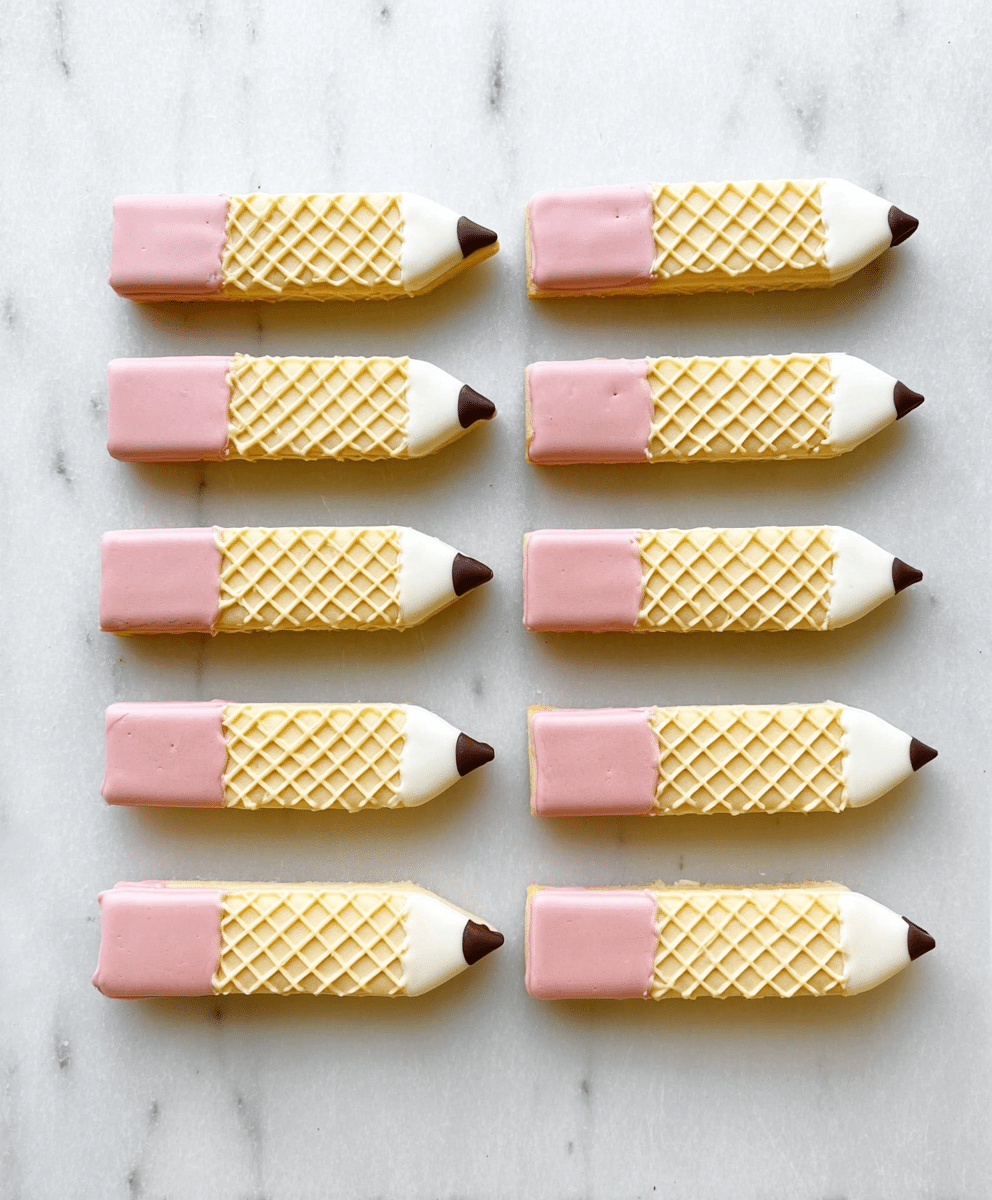
There’s something magical about foods that are as fun to look at as they are to eat. Enter Wafer Pencil Cookies a simple, colorful, and playful treat that brings a little spark of creativity to your kitchen. Perfect for back-to-school lunches, birthday parties, or an afternoon snack with the kids, these little wafer pencils are easy to make, require no baking, and give you the satisfaction of a homemade treat that looks store-bought!
When I first tried these cookies, I was captivated by their whimsical appearance. Tiny wafer cookies, dipped in candy melts, topped with chocolate “lead,” and instantly recognizable as miniature pencils who could resist? They’re charming, versatile, and a breeze to assemble, making them an excellent project for both novice and experienced home bakers alike.
Whether you’re planning a kids’ party, a classroom treat, or a sweet addition to your dessert table, these Wafer Pencil Cookies deliver both style and substance. Plus, they are an effortless way to involve little helpers in the kitchen, giving them a creative outlet while teaching basic candy-dipping skills.
Why You’ll Love This Recipe
- No-bake and easy: Minimal prep and no oven required—perfect for quick treats.
- Fun and creative: Kids will love helping dip and decorate.
- Customizable colors: Switch up candy melts to match holidays, school colors, or party themes.
- Portable and giftable: Perfect for lunchboxes, gift bags, or party favors.
- Quick assembly: From start to finish, these cookies can be ready in under an hour.
Ingredients Breakdown
Here’s everything you’ll need to make 20 fun and festive wafer pencil cookies.
Cookies:
- 20 wafer cookies
Candy Coating:
- 1/2 cup pink candy melts (for the eraser)
- 1/2 cup white candy melts (for the pencil body)
Finishing Touch:
- 20 chocolate chips (to represent the pencil lead)
Servings: 20 cookies
Tools & Equipment Needed
- Microwave-safe bowls or double boiler for melting candy
- Small spoon or fork for dipping
- Wax paper or parchment paper
- Cooling rack (optional, for faster setting)
- Toothpicks (optional, for detail work)
Step-by-Step Instructions
Step 1: Prepare Your Workspace
Line a baking sheet with wax paper or parchment paper. This will keep your dipped cookies from sticking and make cleanup a breeze. Have all candy melts and chocolate chips ready to go.
Step 2: Melt the Candy
Place the pink and white candy melts in separate microwave-safe bowls. Microwave in 30-second intervals, stirring in between, until fully melted and smooth. If you prefer, you can use a double boiler on the stovetop to gently melt the candy.
Step 3: Dip the Wafer Cookies
- Take a wafer cookie and dip one end into the pink candy melts to create the “eraser.” Tap gently to remove excess candy.
- Next, dip the remaining portion of the wafer into the white candy melts to create the pencil body. Hold the cookie above the bowl for a few seconds to let any excess drip off.
Step 4: Add the Chocolate Tip
While the candy coating is still soft, press a chocolate chip onto the tip of the white-coated end to create the pencil lead. Press gently so it sticks but doesn’t break the wafer.
Step 5: Set the Cookies
Place the completed cookies onto the prepared wax paper. Allow them to set completely at room temperature for 20–30 minutes, or speed up the process by placing them in the fridge for 10–15 minutes.
Step 6: Serve & Enjoy
Once set, your wafer pencil cookies are ready to be enjoyed! Arrange them on a colorful platter, in treat bags, or as a cute addition to lunchboxes.
Tips & Variations
- Color swaps: Use any color of candy melts to match themes—yellow for classic pencils, blue for ocean vibes, or seasonal colors for holidays.
- Glittery fun: Add edible glitter or sprinkles on the pink “eraser” for extra pizzazz.
- Chocolate lovers: Drizzle melted chocolate over the pencil bodies for added flavor and design.
- Nut-free & allergy-friendly: Check that your candy melts and chocolate chips are nut-free if serving to children or guests with allergies.
- Mini pencils: Cut wafer cookies in half to make smaller bite-sized pencil treats.
Flavor Profile & Pairings
These wafer pencil cookies have a delightful crunch from the wafers, a creamy sweetness from the candy melts, and a rich chocolate bite from the chocolate chip. The combination is balanced, visually appealing, and fun to eat.
Drink Pairings:
- Hot chocolate or a creamy latte for cozy mornings.
- Cold milk for classic dessert vibes.
- Fruity iced tea or lemonade for a refreshing snack pairing.
Complementary Sides:
- Mini cupcakes or macarons for a dessert table.
- Fresh fruit skewers for a balanced party platter.
- Yogurt cups for lunchbox-friendly treats.
Nutritional Overview
While these treats are more about fun than nutrition, here’s an approximate breakdown per cookie:
| Component | Amount per serving |
|---|---|
| Calories | 80 kcal |
| Protein | 1 g |
| Carbohydrates | 12 g |
| Fat | 3.5 g |
| Fiber | 0.5 g |
Dietary Notes: Nut-free, vegetarian, gluten-free if using gluten-free wafers.
Make-Ahead & Meal Prep Tips
- Candy melts: Melt them just before dipping for the smoothest coating.
- Cookies: Wafer cookies can be pre-arranged on parchment, ready to dip.
- Storage: Store cookies in an airtight container at room temperature for up to 5 days. Avoid refrigerating if your kitchen is humid to prevent the candy melts from sweating.
- Freezing: Not recommended as the candy coating may crack when thawed.
FAQs
Q1: Can I use other types of wafers?
A: Yes! Vanilla, chocolate, or even striped wafers work, but adjust the color of candy melts for contrast.
Q2: Can I melt candy melts in the microwave?
A: Absolutely! Use 30-second intervals, stirring between each, until smooth. A double boiler works great too.
Q3: How do I prevent chocolate chips from sliding off?
A: Press them gently into the soft candy melts immediately after dipping. Allow to set undisturbed.
Q4: Can I make these ahead of time for a party?
A: Yes, they store well at room temperature for a few days. For longer storage, consider assembling closer to the event.
Q5: Can I use dark or milk chocolate for the pencil tip?
A: Definitely! Customize based on taste preferences or to match the theme.
Cooking Timeline (at a Glance)
| Step | Prep Time | Cook/Set Time | Total Time |
|---|---|---|---|
| Prepare workspace & ingredients | 5 min | 0 min | 5 min |
| Melt candy | 5 min | 0 min | 5 min |
| Dip wafers & add chocolate tip | 15 min | 0 min | 15 min |
| Set cookies | 0 min | 20–30 min | 20–30 min |
| Total | 20–25 min | 20–30 min | 40–55 min |
Serving Suggestions
- Arrange on a colorful platter for a birthday dessert table.
- Include in lunchboxes with a note for a fun surprise.
- Wrap in small clear bags tied with ribbon for party favors.
- Stack in mason jars for a playful gift idea.
Recipe Variations
- Rainbow Pencils: Use multi-colored candy melts for a vibrant, rainbow effect.
- Chocolate Lovers’ Pencils: Dip the pencil bodies in milk chocolate and use white candy for the eraser.
- Mini Pencil Bites: Cut wafers in half for small, bite-sized treats perfect for snacking or dessert trays.
Ingredient Spotlight: Wafer Cookies
Choosing the right wafer cookies is key to this recipe. Look for wafers that are crisp and light—not stale or soft—to ensure they hold up during dipping. Vanilla wafers provide a neutral palette, but chocolate or strawberry wafers can add subtle flavors and visual interest. Store wafers in an airtight container to maintain freshness and crunch.
Pro Cooking Tips
- Even coating: Use a fork or dipping tool to cover the wafer evenly and tap off excess candy melt.
- Smooth candy melts: Stir constantly while melting to avoid clumps. Add a tiny bit of shortening if necessary to thin the candy.
- Quick set: Chill cookies in the fridge briefly to speed up hardening but avoid condensation.
Storage & Freezing Guide
- Room Temperature: Airtight container, up to 5 days.
- Refrigerator: Only if your kitchen is very warm; remove before serving to avoid condensation.
- Freezing: Not recommended; candy coating can crack.
Nutrition Estimate Table (Per Serving)
| Nutrient | Amount |
|---|---|
| Calories | 80 kcal |
| Protein | 1 g |
| Carbs | 12 g |
| Fat | 3.5 g |
| Fiber | 0.5 g |
Dietary Notes: Vegetarian, gluten-free adaptable, nut-free options available.
Conclusion
Wafer Pencil Cookies are the ultimate no-bake treat—fun, colorful, and irresistibly charming. Whether you’re crafting a playful snack for kids, assembling a creative dessert platter, or simply indulging in a sweet treat yourself, these cookies are quick to make, easy to customize, and guaranteed to impress. With minimal ingredients, simple steps, and endless decorative possibilities, they’re a must-try for any home baker looking to add a dash of whimsy to their kitchen.
Grab your wafers, melt some candy, and let your inner kid (or your little helpers!) take over these Wafer Pencil Cookies are more than just a snack they’re a canvas for creativity.
Print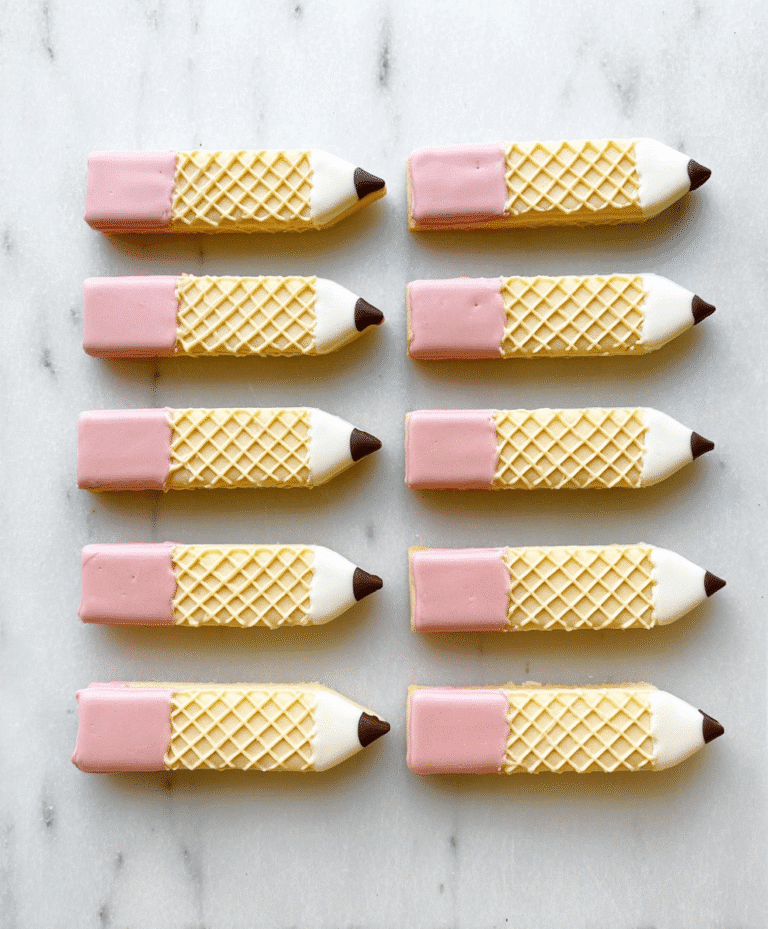
Wafer Pencil Cookies
These pencil cookies are an easy, no-bake treat made with wafer cookies, candy melts, and chocolate chips. Perfect for adding a fun touch to lunchboxes or a simple back-to-school snack.
- Total Time: 45 minutes
- Yield: 20 Cookies
Ingredients
- 20 wafer cookies
- 1/2 cup pink candy melts
- 1/2 cup white candy melts
- 20 chocolate chips
Instructions
- Line a baking sheet with parchment paper.
- Cut one end of each wafer cookie into a point by making two 45-degree cuts.
- Melt the pink and white candy melts in separate bowls according to the package instructions.
- Dip the flat end of a wafer cookie into the pink candy melts to create the eraser.
- Carefully dip the pointed end of the cookie into the white candy melts, ensuring not to touch the pink end.
- Immediately attach a chocolate chip to the tip of the white end while it is still wet.
- Place on the prepared baking sheet and repeat with remaining cookies.
- Allow all cookies to fully set before serving.
Notes
Store the cookies in an airtight container at room temperature for up to a week.
- Prep Time: 15 minutes
- Cook Time: 30 minutes (set time)
- Category: Dessert
- Method: No-Bake
- Cuisine: American
- Diet: Vegetarian